 car maintenance guide, we will explore the different types of car jacks, how to identify
safe lifting points, and crucial flat tire tips to safely elevate your vehicle.
car maintenance guide, we will explore the different types of car jacks, how to identify
safe lifting points, and crucial flat tire tips to safely elevate your vehicle.
1. Types of Car Jacks You Should Know
Not all car jacks are created equal. The tools you use directly dictate how safely and quickly you can accomplish the job.
Scissor Jacks
The scissor jack is the most common jack type included in a vehicle's standard emergency toolkit. It operates via a central screw mechanism that pulls the two sides of the scissor structure together to lift the car vertically. While they are lightweight, compact, and perfectly fine for emergencies, they are slow to operate and can be unstable on uneven ground.
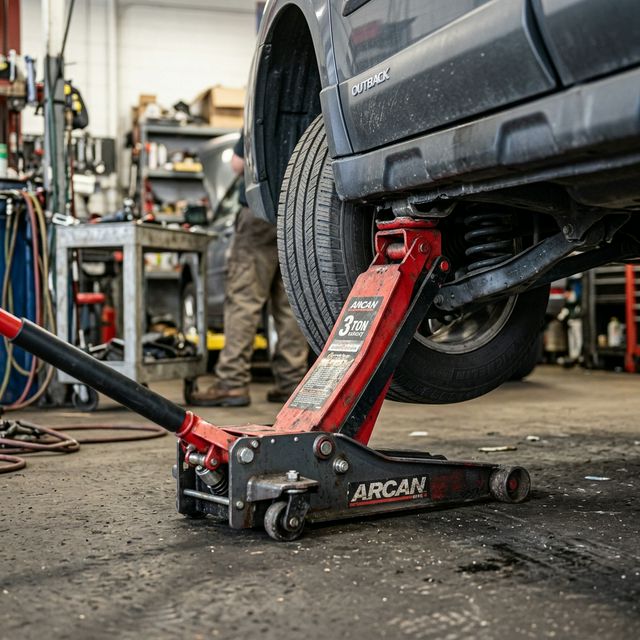
Hydraulic Floor Jacks
Hydraulic floor jacks are preferred heavily by mechanics and serious DIY enthusiasts. They use a hydraulic cylinder to lift heavy vehicles rapidly and securely with minimal physical effort. Floor jacks have wheels for easy positioning and boast a much larger base for enhanced stability. While too bulky to keep in most trunks permanently, having one in your garage is a cornerstone of any good car maintenance guide.
2. Preparing to Use the Car Jack
Preparation is key. You can't just slide the jack underneath anywhere and start cranking. If you lift the vehicle from the wrong point, you could easily punch a hole through your floorboards or damage sensitive lines under the car.
- Find Solid, Level Ground: A jack must be used on a flat, solid, concrete or thick asphalt surface. Never use a jack on grass, dirt, gravel, or a noticeable incline. The vehicle could easily roll or the jack could sink, leading to disaster.
- Engage the Parking Brake: Ensure the car is in Park (or in gear for a manual transmission) and heavily apply the parking brake.
- Chock the Wheels: Prevent the vehicle from rolling by placing heavy bricks, large stones, or dedicated wheel chocks directly behind the tires located on the opposite side of the car you are lifting.
3. Locating the Jack Points
Every vehicle has precisely reinforced structural points specifically designed to bear the entire weight of the car when lifted. These are called "jack points" or "pinch welds."
Consult your vehicle's owner manual to find the exact locations. Typically, you will find these points: just behind the front wheels, and just in front of the rear wheels. Often, you can feel or see a small notch or a heavily reinforced metal lip running along the undercarriage near the car's doors. Placing the jack anywhere else can bend the frame or shatter plastic molding under the car.
4. Step-by-Step: Lifting the Vehicle Safely
If you are exploring how to change a tire safely, lifting the vehicle is the most precarious step. Here are essential flat tire tips to follow:
- Slide the Jack into Place: Position the saddle (the lifting pad) of the jack directly beneath the designated jack point. Ensure they are perfectly aligned.
- Raise the Jack Slightly: Raise the jack until it makes solid contact with the jack point. Check the alignment one more time. If the saddle is off-center, lower it and adjust.
- Lift the Car: Pump the handle or turn the crank steadily. Keep an eye on the jack's base and the contact point. Lift the vehicle just high enough to safely remove the flat tire (typically a few inches off the ground).
- Use Jack Stands (For Non-Emergencies): If you are doing maintenance in your garage and plan to be underneath the car, you MUST lower the car onto heavy-duty jack stands. A jack is a lifting device, not a holding device. However, on the side of the highway for a quick tire change, jack stands aren't usually available. Under those conditions, never place any part of your body directly underneath the vehicle.
5. Lowering the Car Properly
When you are finished with the job, lowering the car correctly is just as important. If you just drop it, the force could shear the freshly installed lug bolts or damage the suspension. Slowly turn the release valve on a hydraulic jack, or carefully unscrew the scissor jack, ensuring the vehicle settles gently back onto its wheels. Once the car bears its full weight again, you can apply the final tightening torque to your lug nuts. Always consult official guidelines when working under a vehicle; the NHTSA Tire Safety Guidelines provides excellent supplemental reading on vehicle and jack safety.
Conclusion
Learning how to change a tire properly means mastering the tools provided to you. Treating a car jack with the utmost respect and care will prevent tragic accidents. By incorporating these foundational flat tire tips into your toolkit, you are ensuring safety every time you hit the road. Be sure to check other sections of our car maintenance guide to become the ultimate prepared driver.